Compress
Make your videos and music smaller, or a lower resolution, without a drop in quality you would notice.
Compress turns your files into smaller copies. For video you can shrink them while keeping the quality about the same, bring them down to a lower resolution, or both. For music you can pick a smaller format. A big library often gets a lot smaller with no difference you can see or hear.
It is on Videos → Compress and Audio → Compress.
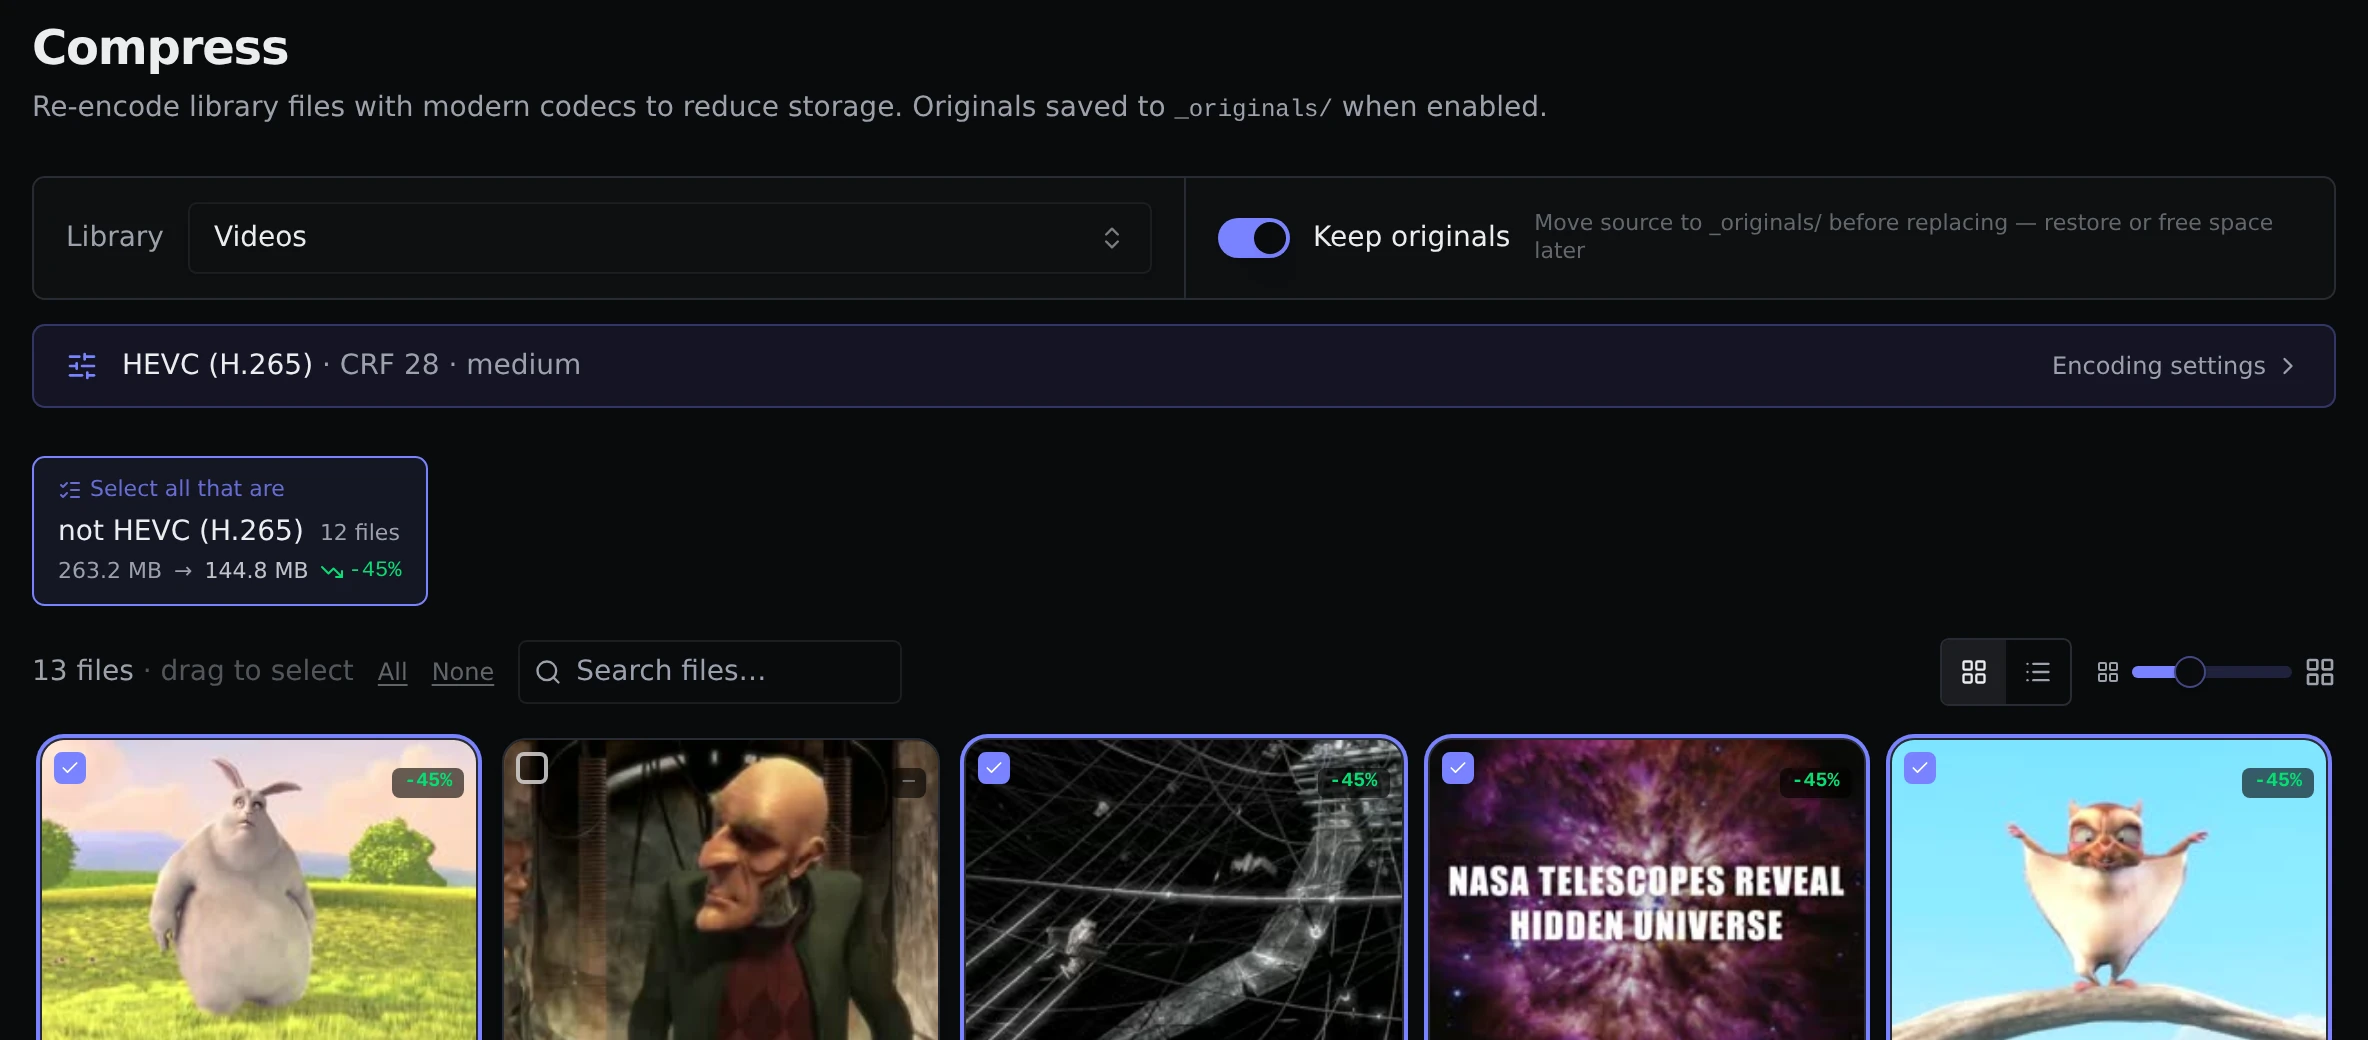
The short version
- Open Compress and pick a library.
- Choose how you want the files to come out in Encoding settings.
- Select the files to compress.
- Click Compress in the bar that appears at the bottom of the page once something is selected.
The page shows a live estimate of how much space you will save before you start, so you can try different settings first without changing anything.
Encoding settings
Click the bar that says Encoding settings to open the settings drawer. The page stays usable while it is open, and the estimates update as you change things.
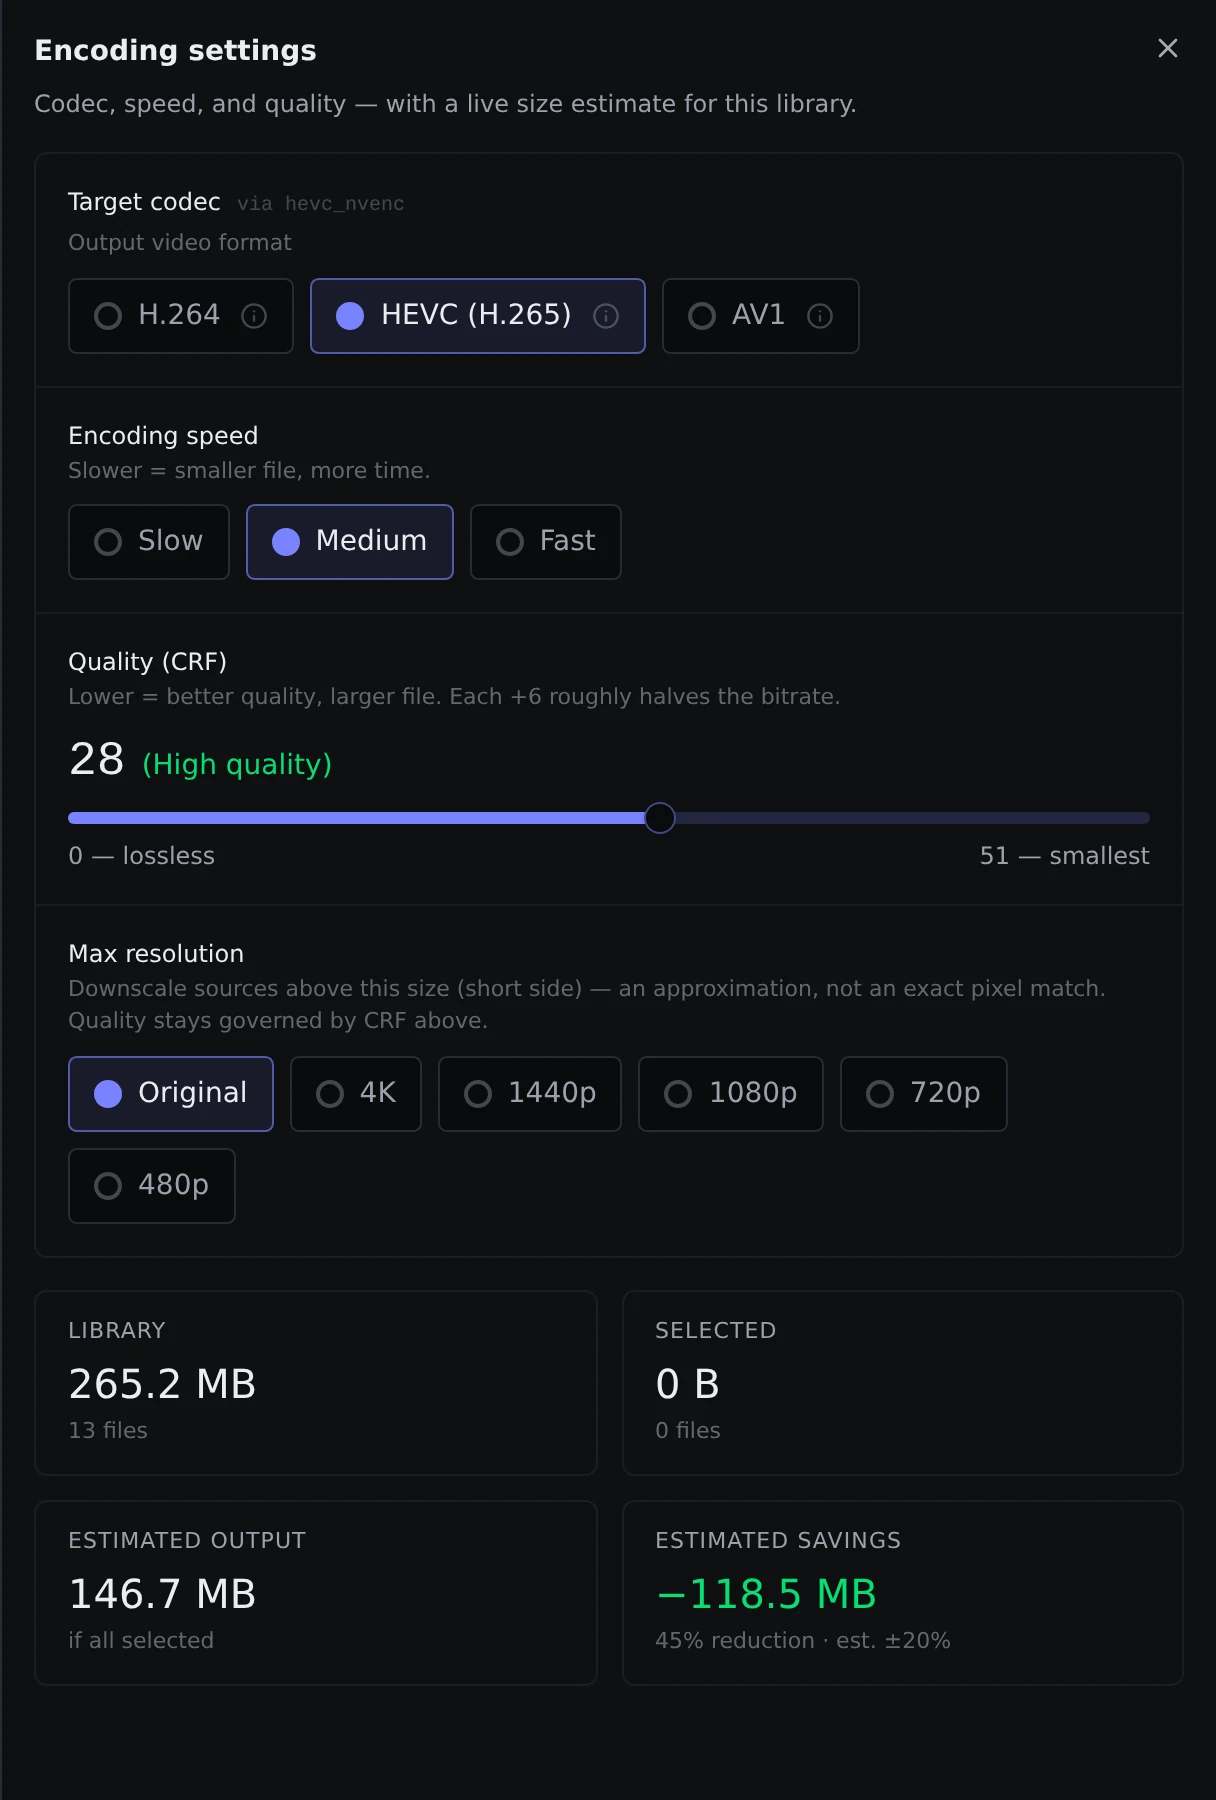
Target codec is the video format of the new files.
- H.264 plays almost everywhere. It makes moderately smaller files.
- HEVC (H.265) makes files roughly 40 to 50 percent smaller than H.264 at the same quality. Most modern phones, TVs and apps play it. This is the default.
- AV1 can be 50 to 60 percent smaller than H.264, but it takes longer to make and only newer devices and apps play it.
Encoding speed lets you trade time for size. Slow takes longer and gives smaller files, and Fast is the other way around.
Quality is a slider with a number and a label next to it, from "Visually lossless" through "High quality" and "Good quality" to "Noticeable loss" and "Severe degradation". A lower number keeps more quality and makes a bigger file. A higher number makes a smaller file and loses more detail. The default is a good starting point, and the estimate tells you what a different choice would save.
Max resolution is optional. If you pick 1080p, for example, any video bigger than that is scaled down to fit, and videos already at or below it are left alone. This looks at the shorter side of the picture, so tall phone videos are handled correctly too. Leave it on Original if you only want to reduce file size.
The estimates
The boxes at the bottom of the drawer show the size of the library, the size of what you have selected, what it should come to afterwards, and the saving. These are estimates, and can be out by around 20 percent for video and 5 percent for audio. If it says your files would grow, move the quality or bitrate toward the smaller end.
Choosing files
Select files by ticking them, dragging a box around them, or using All and None. There is also a search box.
On video, cards labelled Select all that are pick a group for you and show how many files it covers and what the saving would be:
- not HEVC (or whichever format you chose) selects videos that are not already in that format.
- above 1080p (or whichever size you chose) shows up once you set a max resolution and selects the videos that are bigger than it.
- over 1 GB selects the big files.
Every video card also shows the saving it would get.
Keeping your originals
Keep originals is a switch in the strip at the top of the page, next to the library picker, and it is on by default. When it is on, the old version of each file is moved to an _originals folder next to it and the new, smaller one takes its place. You can look through, restore or delete them on the Originals page.
If you switch it off, the original is replaced and you cannot get it back. Leave it on until you are sure you like the result.
While it runs
Compressing happens in the background. A banner on the page shows which file Parallax is working on and how far along it is, and you can cancel at any time. It also appears on the Jobs page. The space you save is added to your totals on the Home page.
If you have given Docker a graphics card, Parallax uses it to compress video faster. See Hardware acceleration if you want to set that up.
To compress several files at the same time, change Concurrent video transcodes (per GPU) under Settings → Transcoder. Music has its own Concurrent audio transcodes setting on the same tab, because it always runs on the processor. These control how many files one job handles at once. Concurrent jobs in Settings → General is a different setting, for how many whole jobs run side by side.